
“The goal is to turn data into information, and information into insight.”
Carly Fiorina, former executive, president, and chair of Hewlett-Packard Co.
The Power of Website Data
You may be thinking to yourself, “Data? What do I need data for? I’m not a tech expert, and as long as I have my sales numbers in front of me, I’m all set!”
Well, this thought process is all well and good, and for some small businesses may even just be good enough… But here’s the problem.
Your customers are online, on Google, and inundated with more options [read: competitors] than ever before.
This means:
- You have to know what your customers expect in a website experience
- You need to know what your competitors are doing online
- You absolutely must know how potential customers are using your website and where they are coming from
Collecting Data to Improve Marketing & Sales
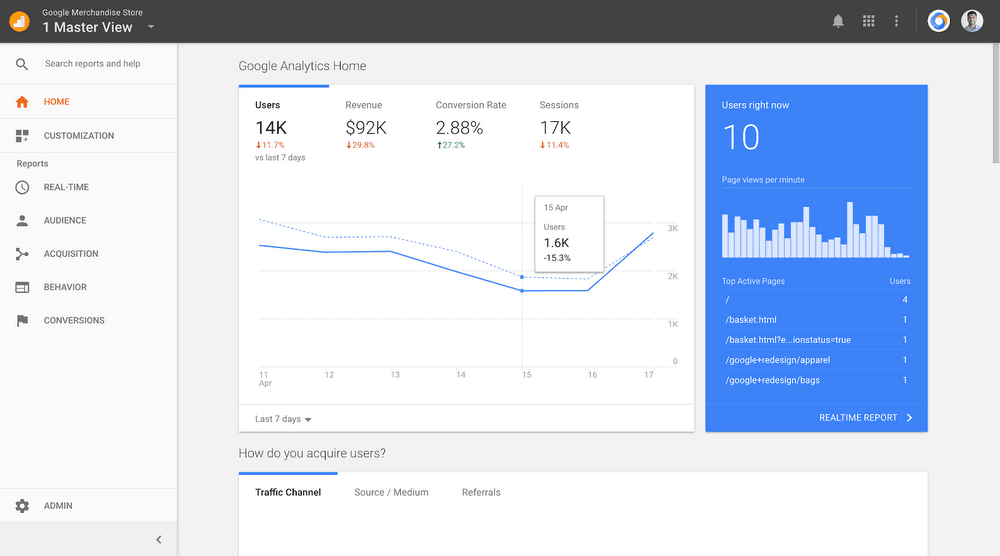
Google Analytics is a great way for you to better understand:
- Who’s coming to your website (age, demographics, etc.)
- Where they’re coming from (city, state, etc.)
- How they found you (Google, paid ads, business directory, etc.)
- What they’re interested in (top pages, top session durations)
- What they don’t like about your site (bounce rates, short durations)
- Which marketing efforts help the sales process (assisted conversions)
It should be evident that with the information above at your fingertips, you can be better positioned to make more informed sales and marketing decisions, as well as improve your website to both capture more visibility online as well as convert more of your website visitors into leads.
How to Install Google Analytics
Depending on how your small business website is built, installing Google Analytics can be a breeze, or take just a bit of technical know-how. In any case, it’s fairly straightforward and with a little help, you’ll be up and running with Google Analytics website and marketing data in no time!
Step 1: Create a Google Account
In order to install Google Analytics on your website, you’ll first need to create a Google Analytics account.
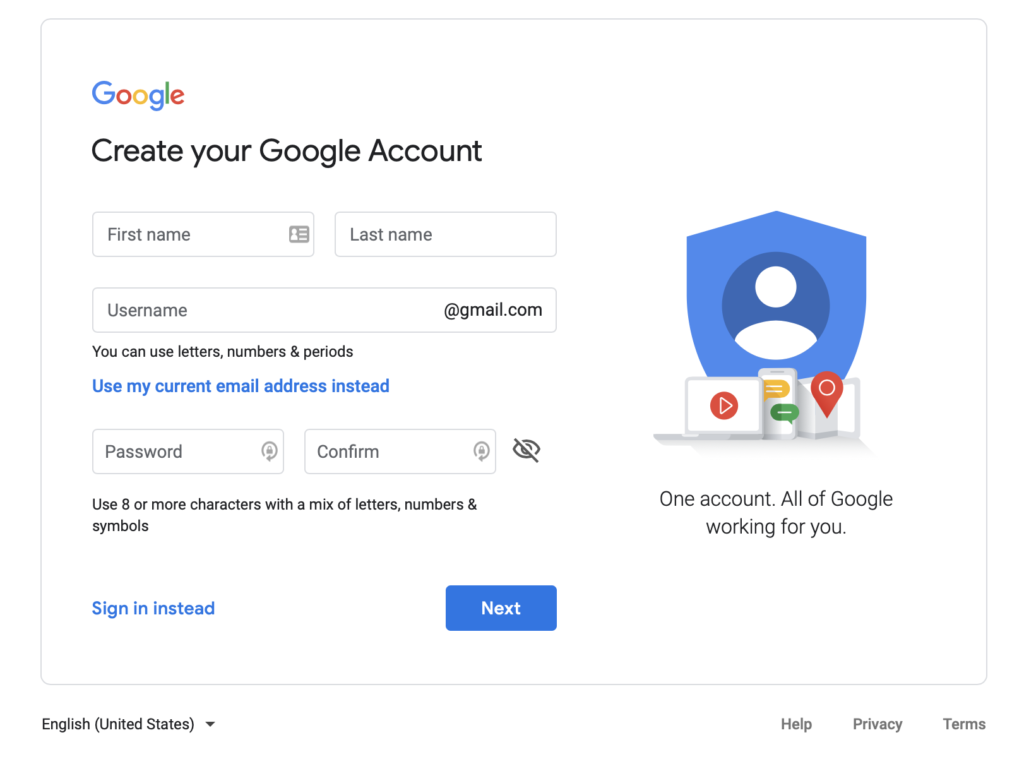
If you don’t have a Google Account already
If you’re not on Google already, you’ll first need to create a free Google Account. To get started, simply visit this link:
https://accounts.google.com/signup
If you do have a Google Account already and you’re ready to go.
If you’ve already got a Google Account or you’ve recently completed the set up of a brand new Google Account, you can proceed with creating your Free Google Analytics Account.
To do this, simply visit this link:
From here, you’ll be prompted to create a new Analytics Account (click Start for Free).
Step 2: Once you’re in, you need to get your Website Tracking Code
The way Google Analytics captures your website traffic data is by gathering information from your website via a global Tracking Code, and feeding that data securely back to your Google Analytics Account.
Your Google Analytics Tracking Code will need to be installed on every page of your website, what’s called your website “Header.” This is where things can be a bit complicated, but if you have a developer you can provide this code to, the process will be a breeze.
The video below will show you how to find your unique Google Analytics tracking code, which you can then share with your developer.
Pro Tip: In some cases, if you built your website on a DIY builder platform like Squarespace, Wix, or Weebly, there are easy Google Analytics integrations available to you through your website builder dashboard.
Step 3: Verify successful tracking
There are several ways to verify that you’ve successfully installed Google Analytics on your website.
Method 1: Wait & See
Typically, it takes anywhere from 24-48 hours for standard reports to begin populating with data in Google Analytics. After 2 days or so, visit https://analytics.google.com, navigate to your website View, and click around and see if any of the reports are populated with data.
If so, you’re good to go!
Method 2: Check the Real-Time Reports
If you’d prefer not to wait 1-2 days, you should be able to check you Real-Time Reporting section in Google Analytics to ensure data is being processed.
You’ll find this under Reports > Real-Time. If you’re seeing data being populated there, you’re all set!
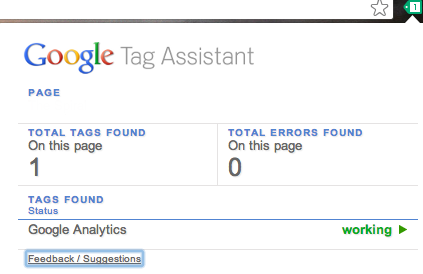
Method 3 (Advanced): Google Tag Assistant
While we might consider this a more advanced verification method, it’s a fairly simple set of steps. Google Tag Assistant is a free Google Chrome browser plugin that allows you to see how Google Tracking tags are installed on yours (or others’) websites.
For the purposes of verifying your Google Analytics Tracking setup, you can install Google Tag Assistant for Chrome here.
Once that’s been installed, simply navigate to your website, and click the Tag Assistant icon in your Taskbar.
Additional Resource: How to Use Google Tag Assistant
Knowledge is Power
Setting Google Analytics up is just the start. The more time you spend in this powerful platform, and the more you learn, the more you’re able to steer your online presence, generate more high quality traffic and ultimately generate more leads.